# Creating Test Cases
In this guide, we will see, how you may quickly write your maintainable API Tests within a few seconds. Before starting, We are assuming that you have already installed vREST NG and created a project in it.
In vREST NG,
- A group of HTTP requests (or APIs) can be organized to be executed in sequence
- and each HTTP request is represented as a test case
- and each test case can be validated with the help of assertions.
Now, we will walk through step by step, how you may validate a REST API in vREST NG. You may also follow the same steps in your installed vREST NG Application. And feel free to contact us if you face any issues.
For this guide, we will take a sample API that creates a Contact in our sample test application. The details of the API is as follows:
API Endpoint
http://example.vrest.io/contacts/v1/test/contacts
Request Method:
POST
Request Body:
{
  "name": "<String>",
  "email": "<String>",
  "designation": "<String>",
  "organization": "<String>",
  "country": "<String>",
  "aboutMe": "<String>",
  "twitterId": "<String>",
  "facebookId": "<String>",
  "githubId": "<String>"
}
Request Headers:
{
  "Content-Type": "application/json"
}
Note: This API doesn't need any authentication / authorization. Because that will make this guide more complex. For more information on Authorizations, read authentication / authorization.
Now, let us take step by step approach on, how we can validate this API in vREST NG.
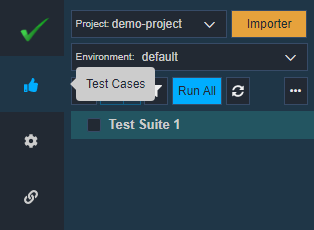
To create a test case, you need to open your project. This will land you on the Test Cases tab (located in the left sidebar)
# Creating Test Case
Once you are in the Test Cases tab,
- Click on the
 button in the left pane.
 - A dialog window will pop up saying "Add New Test Case". Fill in the details as shown in the image below:
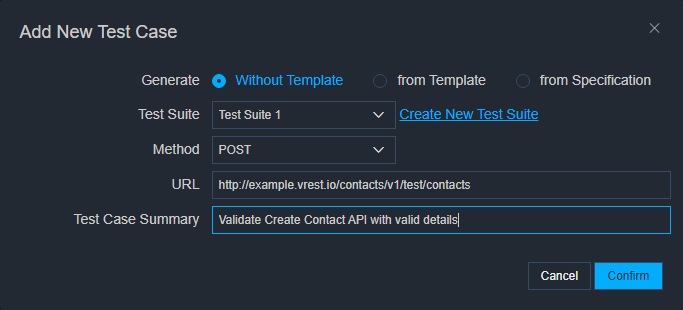
- Select the Test Suite
- Select your API's request Method e.g.
POST. - Enter your API URL in the Test Case URL field e.g.
http://example.vrest.io/contacts/v1/test/contacts. - Provide a summary describing your test case, in the Test Case Summary field.
- Click

Note: You might not see the Generate option in the Community Edition. For this guide, we are not using any generation capability, so you may still follow the guide further without any issue.
Voila! You have created your test case. You will also see a similar screen as shown in the image below:
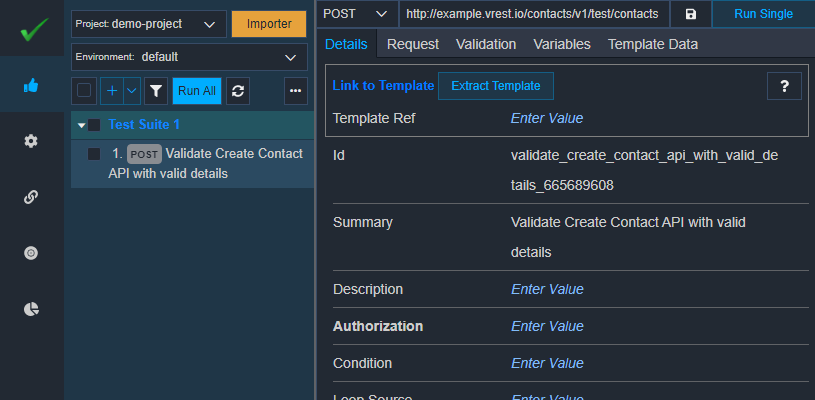
You may view this test case on the file system at this location <PROJECT_DIR>/testcases/<TEST_CASE_ID>.json. You may edit this auto-generated test case id (Edit the Id field) to make it more human-friendly.
Now let's define the request body for our API.
# Defining Request Body
To define the request body
- Go to the
RequestTab in your test case - Under the
BodySub-Tab, you will see the section to enter your request body in JSON format. - vREST NG supports other formats as well e.g. JSON, XML, Text, or Form URL Encoded format.
You may use the following request body for our sample test case:
{
  "name": "vREST NG",
  "email": "support@vrest.io",
  "designation": "API Automation Testing Tool",
  "organization": "https://optimizory.com",
  "country": "India",
  "aboutMe": "World's #1 Automated API Testing Tool.",
  "twitterId": "vrest_io",
  "facebookId": "optimizory",
  "githubId": "Optimizory"
}
- After you have entered the request body information, click on
 button.
Now, you may define the request headers.
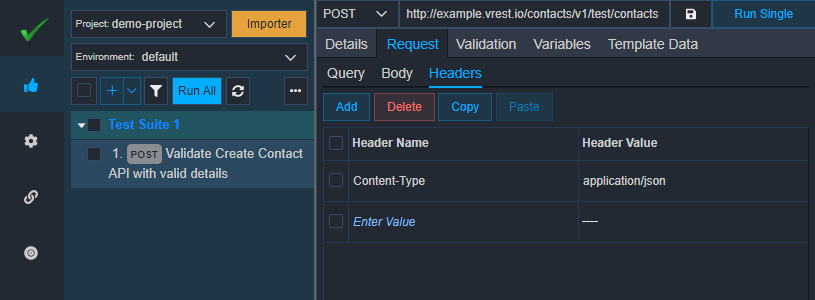
# [Optional] Defining Request Headers
vREST NG will automatically send the appropriate Content-Type request header based on the request body, which you have specified. But if you want to override the Content-Type header or want to define any other request header(s) then you may define using the steps below. To define the request headers,
- Go to
HeadersSub-Tab underRequestTab. - Click on
 (A new row will be added to your list of headers).
 - Click on Enter Value for the
Header Namecolumn and enter the header name. - Then provide the Header Value.
Now, let us see, how you may validate your API response in vREST NG Application.
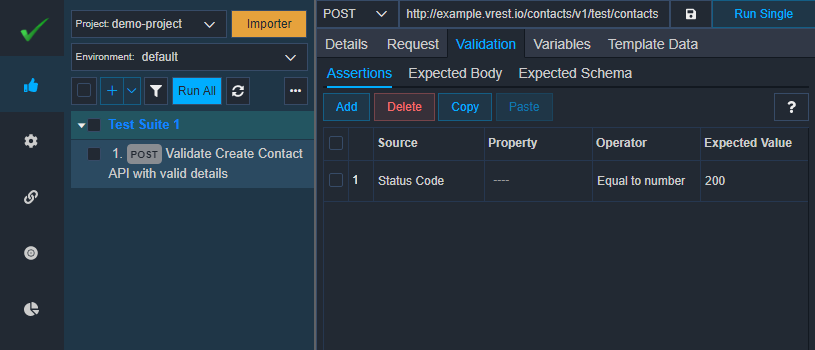
# Define assertions for Validation and Execute the test case
In the Validation tab, define the assertions for your test case response. vREST NG provides powerful response validation capabilities without writing a single line of code. It automatically adds a status code assertion, which will validate the API against the expected value 200. You may change the expected value as per your needs.
Let us try to execute this test case. To execute this test case, simply click on either the Run Single button available in the middle pane or the Run All button available in the left pane. You may see the results in the Results tab as shown in the image below:
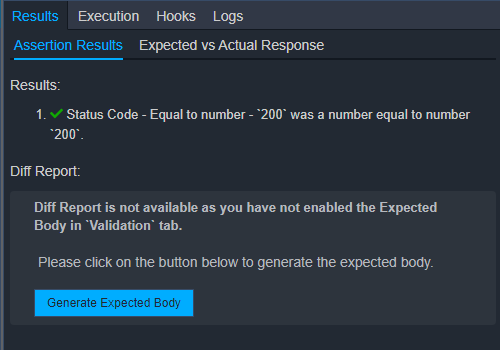
Note: Diff report section will not be available in the Community Edition
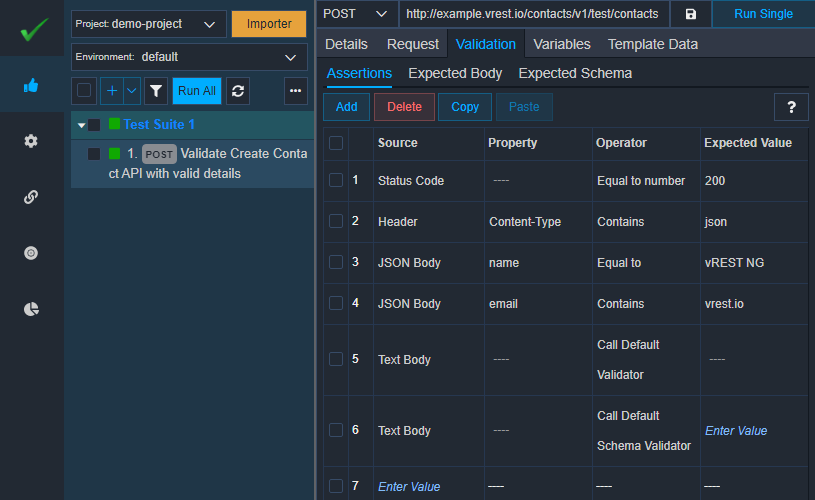
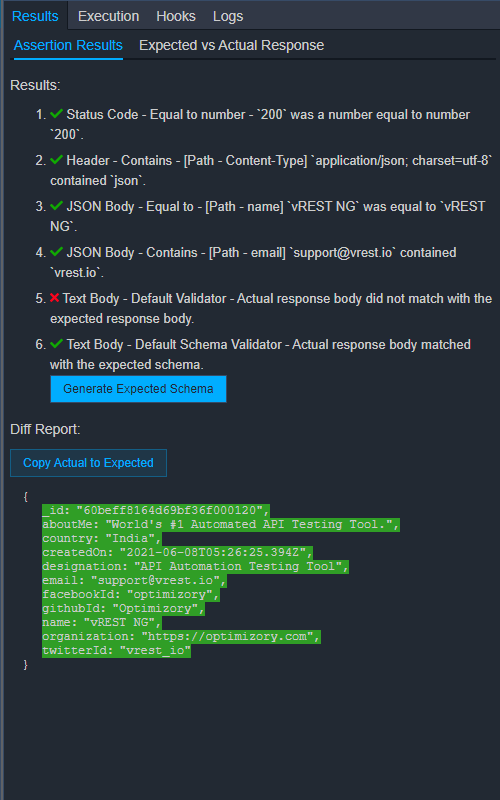
So far, we have validated our test case with a simple status code assertion. Let us try to add some more assertions to understand the powerful response validation capabilities. We have added the following assertions as shown in the image below:
- Assertion to verify the response status code as discussed earlier.
- Assertion to verify the response header 'Content-Type'. We are checking whether the actual value of this response header contains the
jsonsubstring or not. JSON Bodyassertion to validate the API response propertyname. We are checking the actual value against the expected value using theEqual tooperator.JSON Bodyassertion to validate the API response propertyemail. We are checking whether the actual value contains the substringvrest.io.Text BodyAssertion to verify full response content. Here, we are verifying the response via invokingDefault Validator.Default Validatorsimply matches the expected response body (defined in theExpected Bodysubtab) with the actual response body received. We will define the Expected Body soon.Text BodyAssertion to verify API response structure using JSON Schema. We are verifying the response structure via invokingDefault Schema Validator.Default Schema Validatorsimply matches the actual response against the expected response structure defined in theExpected Schematab. We will define the Expected Schema soon.
You may also define the above assertions in Validation tab as shown in below image:
Now, when we execute this test case, then the test case will try to execute all the assertions. If any of the assertions is failed then the whole test case will be marked as failed.
So, let's try to execute this test case. As you can see in the left pane that the test case has failed as shown in the image below:

Now go to the "Results" tab of this test case to see the failure reason. The test case has failed because we have not set any Expected Body for the test case, as you can see in the Diff Report. Default Validator needs this expected body to compare with the actual response body.
Note: Diff report section will not be available in the Community Edition
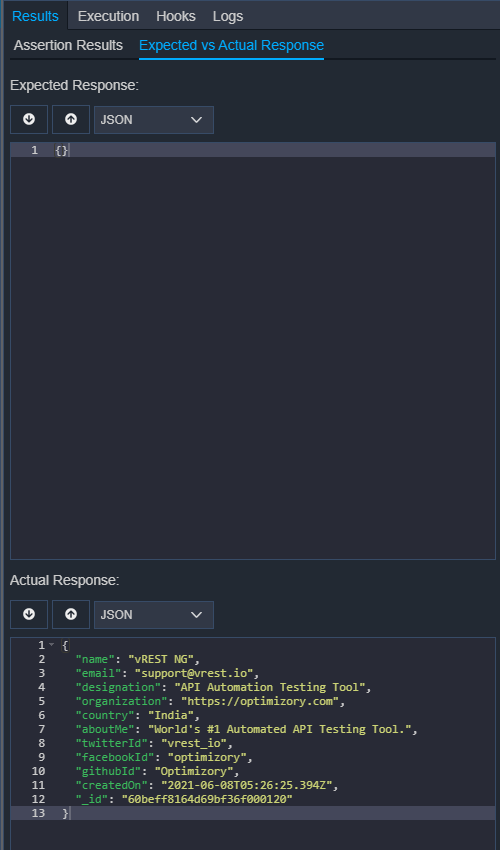
Users having Community Edition, may use the report Expected vs Actual Response to check the failure reason of this test case.
Now, in the Diff Report section, click on  button to copy this actual response body to the expected body in the test case. You can see that our test case's expected body has been automatically set.

And also our 6th assertion is passed because we have not added any response structure constraints using the JSON schema in the Expected Schema tab. You may generate the expected schema by clicking on the button Generate Expected Schema and you may fine-tune the generated schema as per your needs. Your Expected Schema tab will look like this:

Now run the test case again. This time, the test case has failed again.

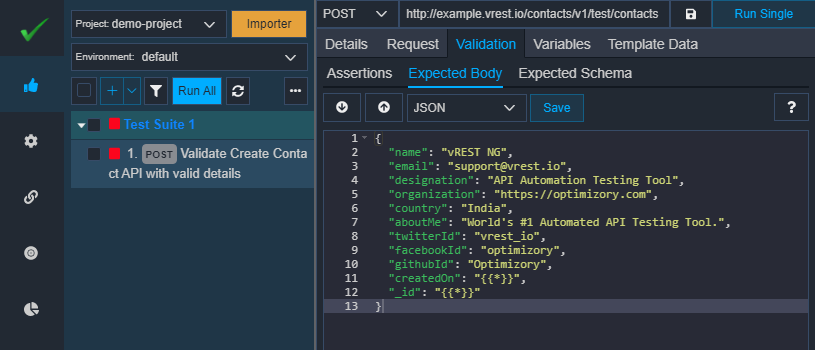
This time, the test case has failed due to some dynamic properties "_id" and "createdOn" in the API response. We can ignore these dynamic properties by using a special variable {{*}} or we can even validate these dynamic fields against their respective regular expressions as well. For simplicity, let us ignore these dynamic fields. We can modify our expected body as below:
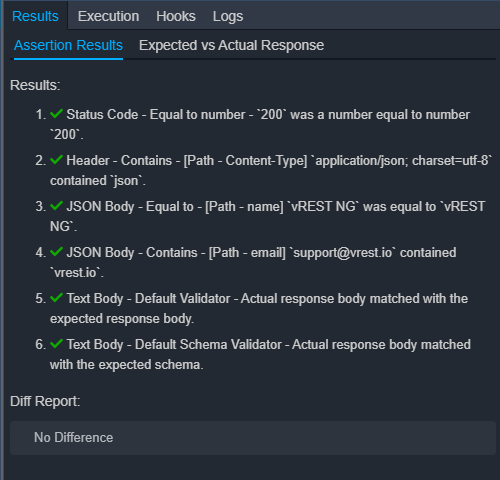
Now, run the test case again. This time, our test case will be passed.
In this manner, you may create a suite of positive and negative test cases by copying and pasting the above test case and modifying particular request details.
You may chain multiple requests or you may fetch data from an excel sheet to perform seamless data driven testing.