# Azure DevOps Integration
This article will guide you on how you may integrate vREST NG with Azure DevOps via the vrest-ng-cli module.
# Download configuration file
Please download the below file and rename it as azure-pipelines.yml. And add this file in the root directory of your source code repository.
If you are using NodeJS based project:
If you are using other than NodeJS based project:
# Explanation
The process contains the following major steps in order to integrate the vrest-ng-cli module. The steps are written on the basis of the ubuntu machine.
Download and install vREST NG CLI binary:
First, download and install the vREST NG CLI module.
Via NPM way
...
# [Use this step] To define the vrest-ng-cli version to be downloaded
variables:
  vrest_version: '2.0.0' #vrest-ng-cli version to be downloaded

steps:
# [Use this step] To install vrest-ng-cli binary as an npm module
- task: NodeTool@0
  inputs:
    versionSpec: '10.x'
  displayName: 'Install Node.js'

# [Use this step] Install vrest-ng-cli as a npm module
# Change version if you would like to install different version
- script: npm install -g vrest-ng-cli@$(vrest_version)
  displayName: 'Install vrest-ng-cli'
...
Via Direct Download way
...
# [Use this step] To define the vrest-ng-cli version to be downloaded
variables:
  vrest_version: '2.0.0' #vrest-ng-cli version to be downloaded
  vrest_uversion: '2_0_0' #underscore variant of vrest-ng-cli version

steps:
# [Use this step] To check whether the binary already exists or not
- bash: |
    if [ -f /home/vsts/.cache/vrest/vrest-ng-cli ]; then
      echo "##vso[task.setVariable variable=VREST_CLI_EXISTS]true"
    else
      echo "##vso[task.setVariable variable=VREST_CLI_EXISTS]false"
    fi

# [Use this step] Download and Install vrest-ng-cli from Github Release
# Change version if you would like to install a different version
# Change OS if you would like to install on a different operating system
- script: |
    mkdir -p /home/vsts/.cache/vrest
    wget -O /home/vsts/.cache/vrest/vrest-ng-cli -q https://github.com/Optimizory/vrest-ng-cli/releases/download/v$(vrest_version)/vrest_ng_cli_linux_$(vrest_uversion)
    chmod +x /home/vsts/.cache/vrest/vrest-ng-cli
  displayName: 'Download and Install vrest-ng-cli binary'
  condition: eq(variables.VREST_CLI_EXISTS, 'false')
...
# Execute vREST NG Tests
To execute the vREST NG tests, use the following code. For detailed information on the
vrest-ng-clicommand-line options, please follow this guide link.... # [Use this step] To run vREST NG written Tests - script: vrest-ng-cli run --projectdir=test/scenario-tests --logger=xunit displayName: 'Run vREST NG Tests' ...Note: If
vrest-ng-cliis not in path then provide the absolute file e.g./home/vsts/.cache/vrest/vrest-ng-cli# Publish Test Results
Finally, publish the test results produced by xunit logger of the
vrest-ng-climodule. By default vrest-ng-cli module exports the report in thevrest_logs/logs.xmlof the current working directory. So, we can use those generated reports to publish them in Azure DevOps.... # [Use this step] To publish test results to azure pipelines - task: PublishTestResults@2 inputs: testResultsFormat: 'JUnit' testResultsFiles: 'vrest_logs/logs.xml' searchFolder: '$(System.DefaultWorkingDirectory)' condition: succeededOrFailed() ...
# Reporting
vrest-ng-cli module generates the following types of reports in Azure DevOps pipelines:
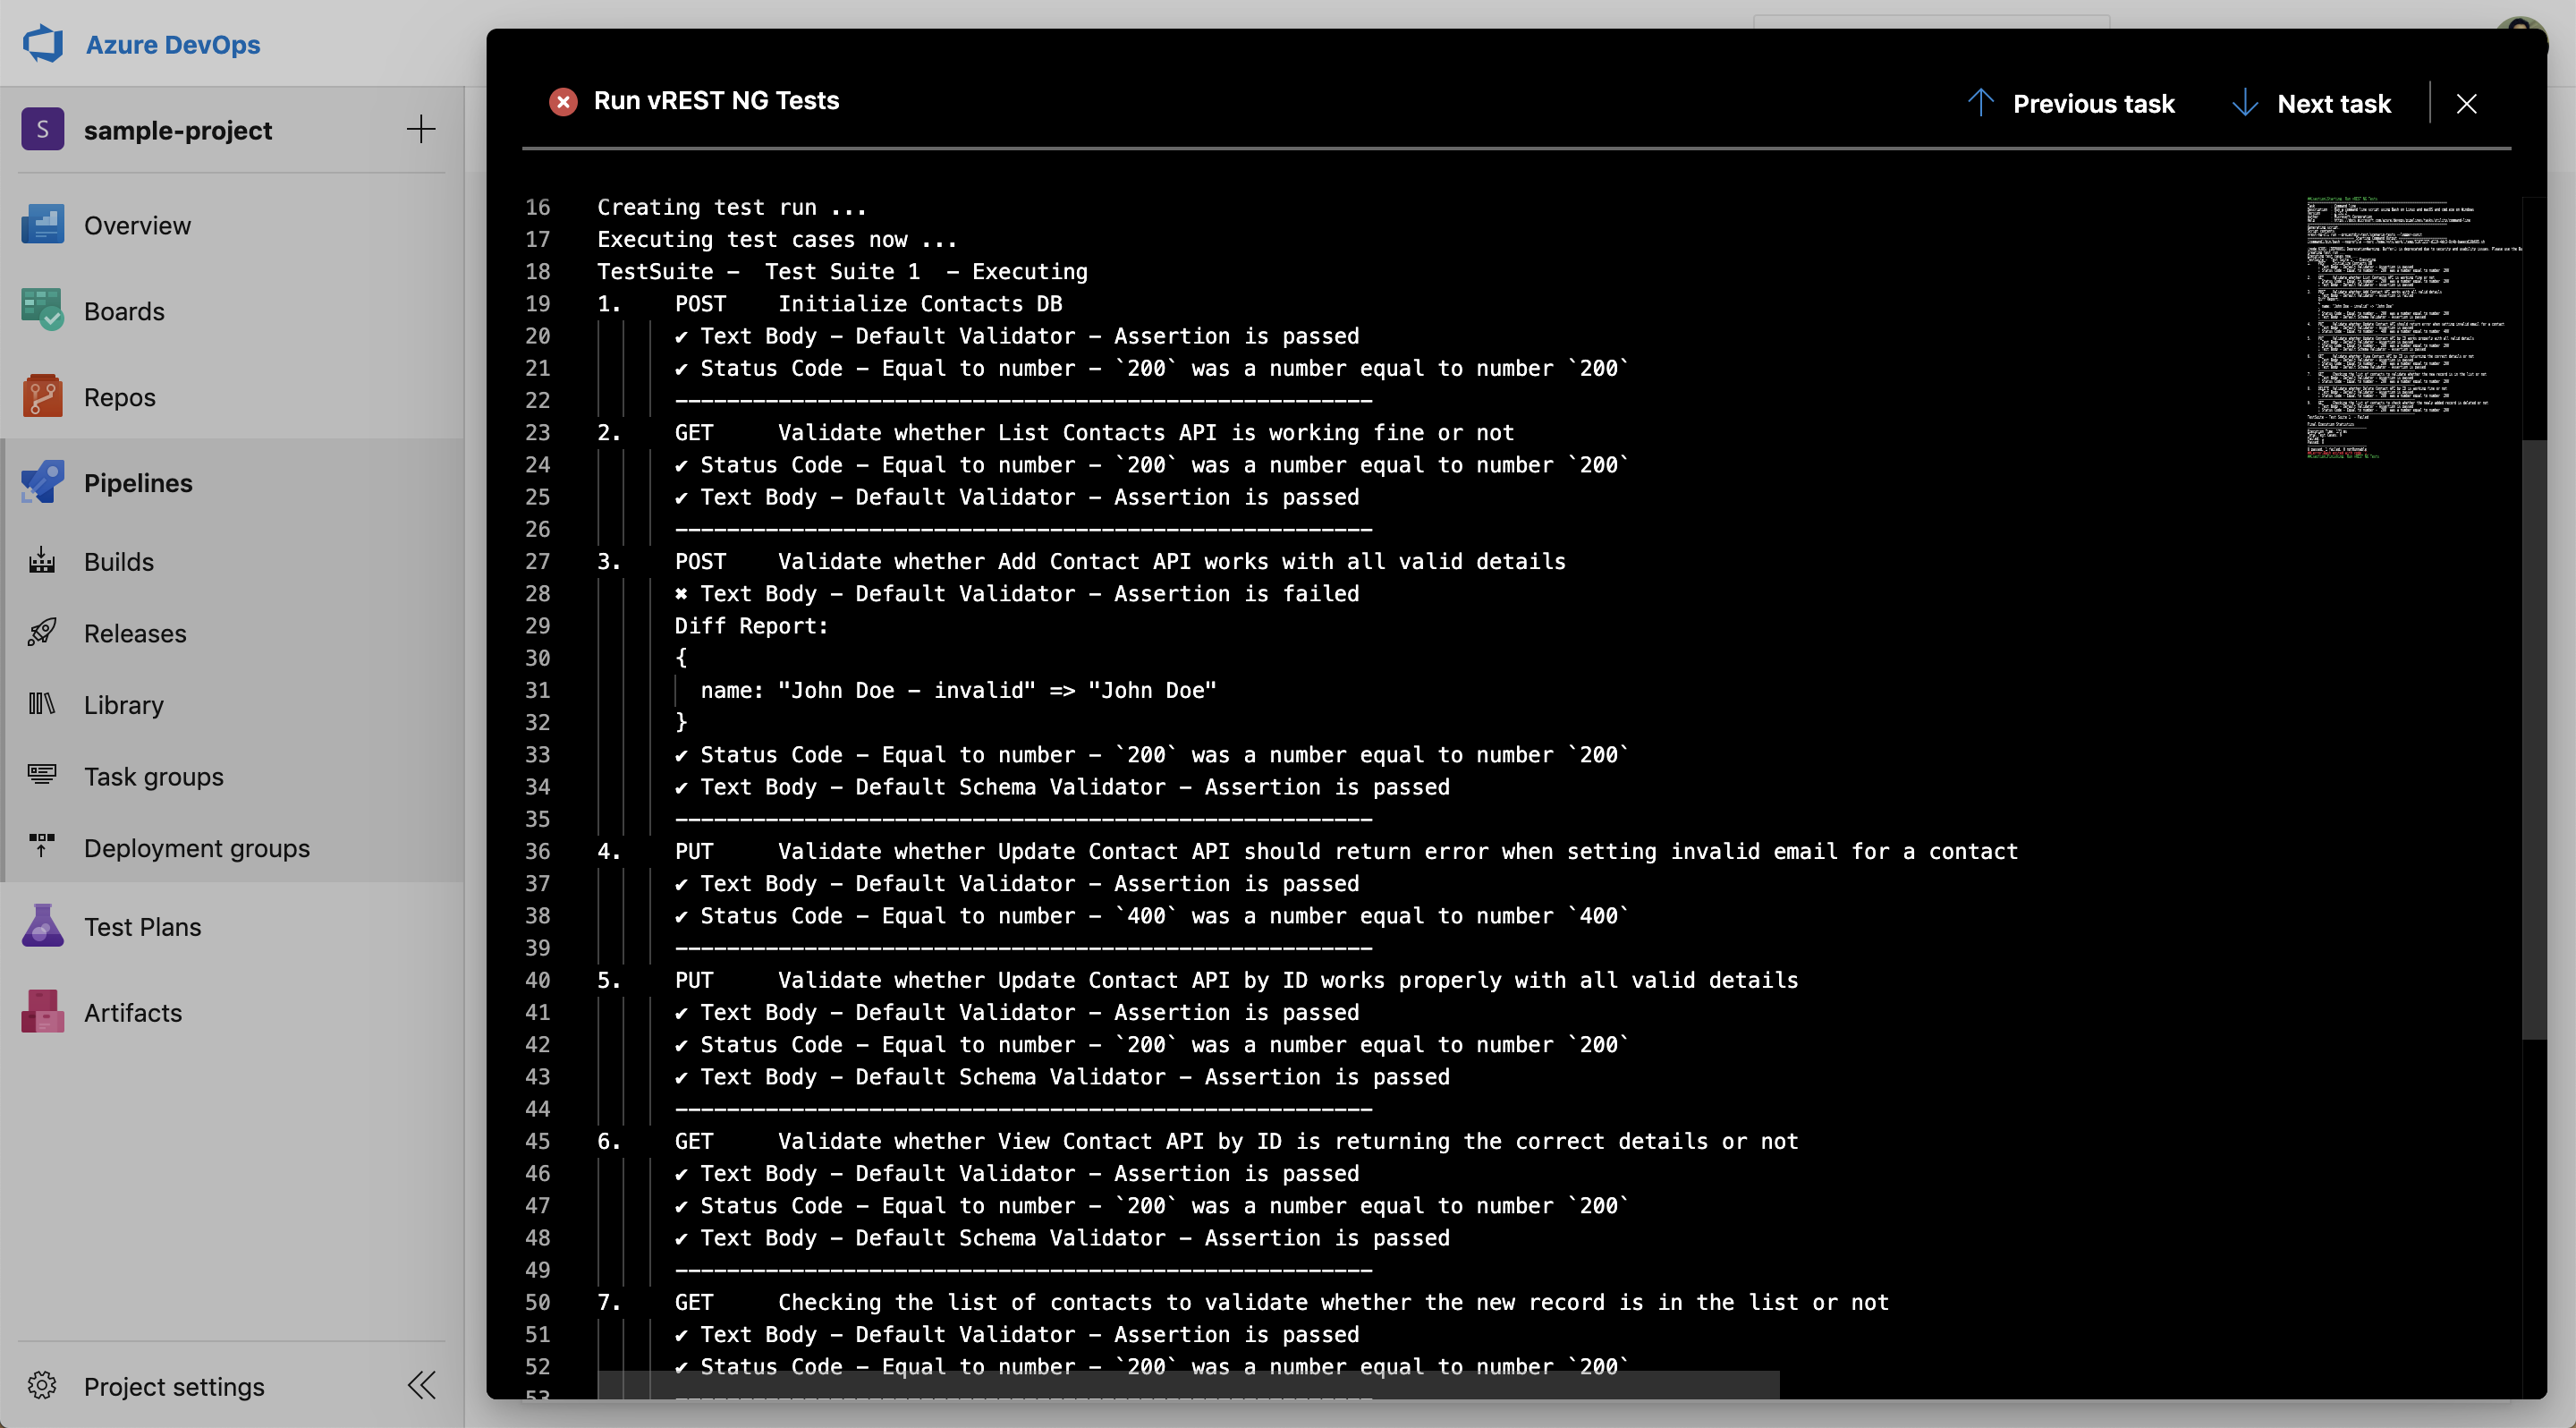
- Console Report
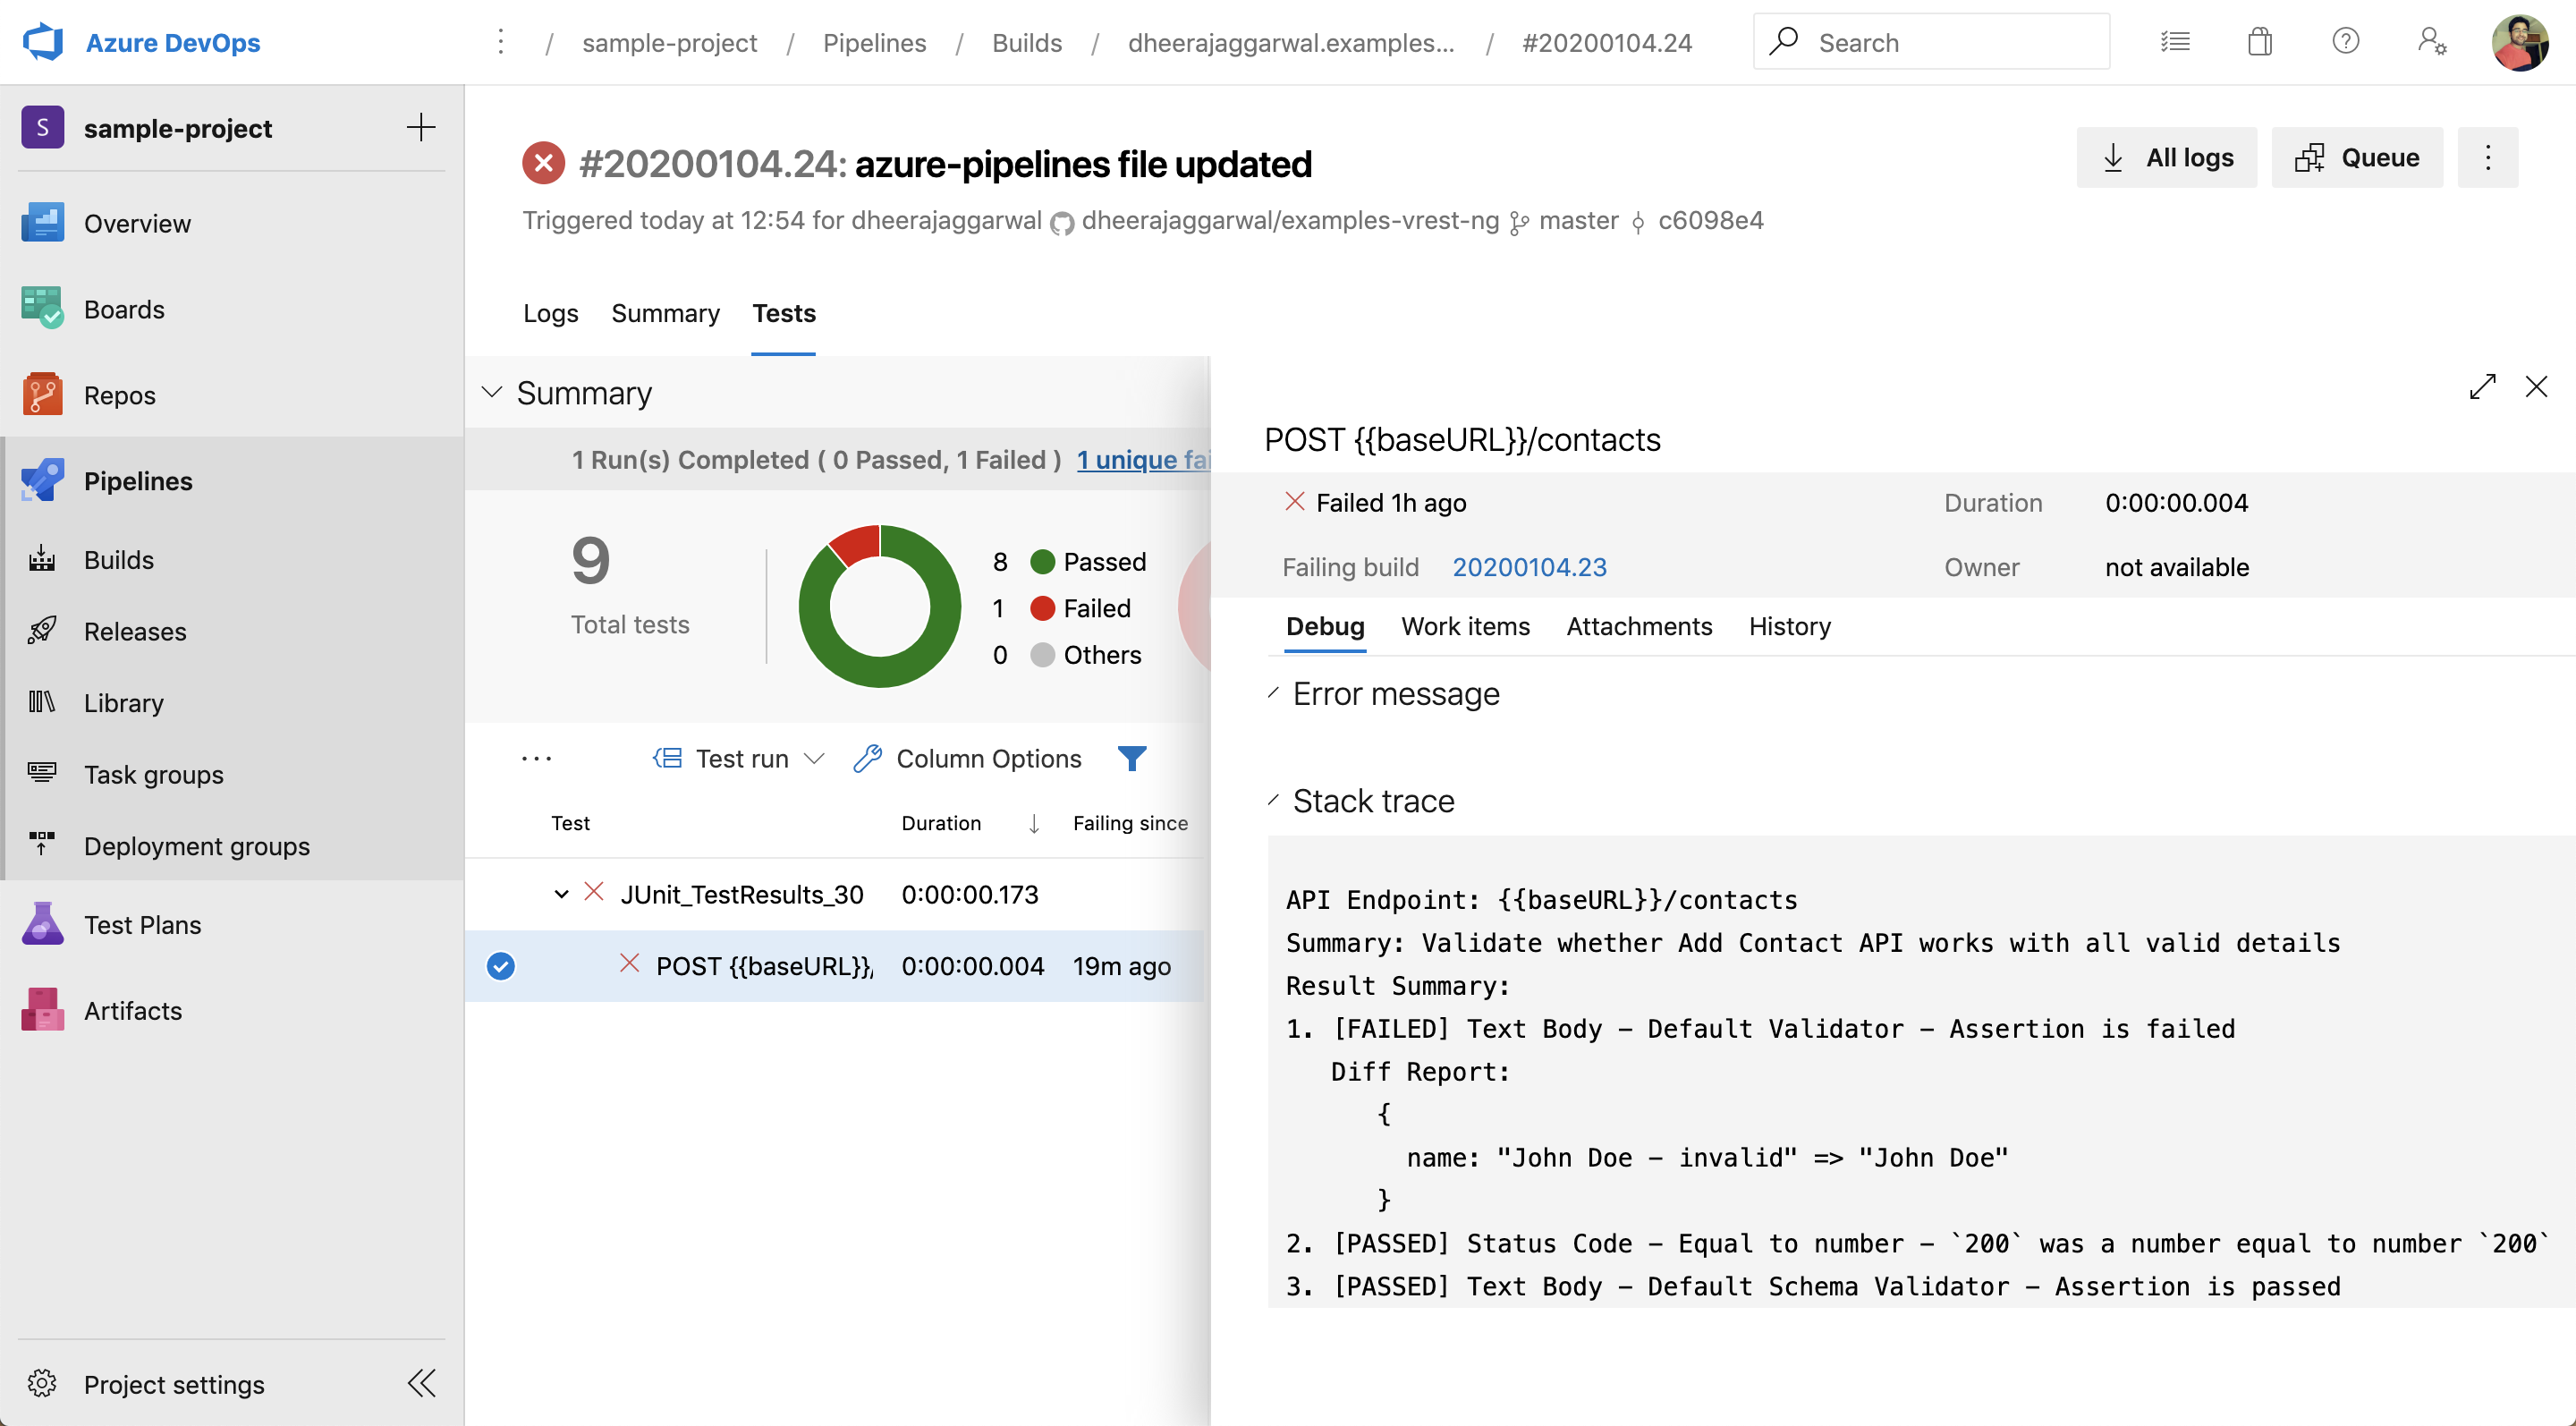
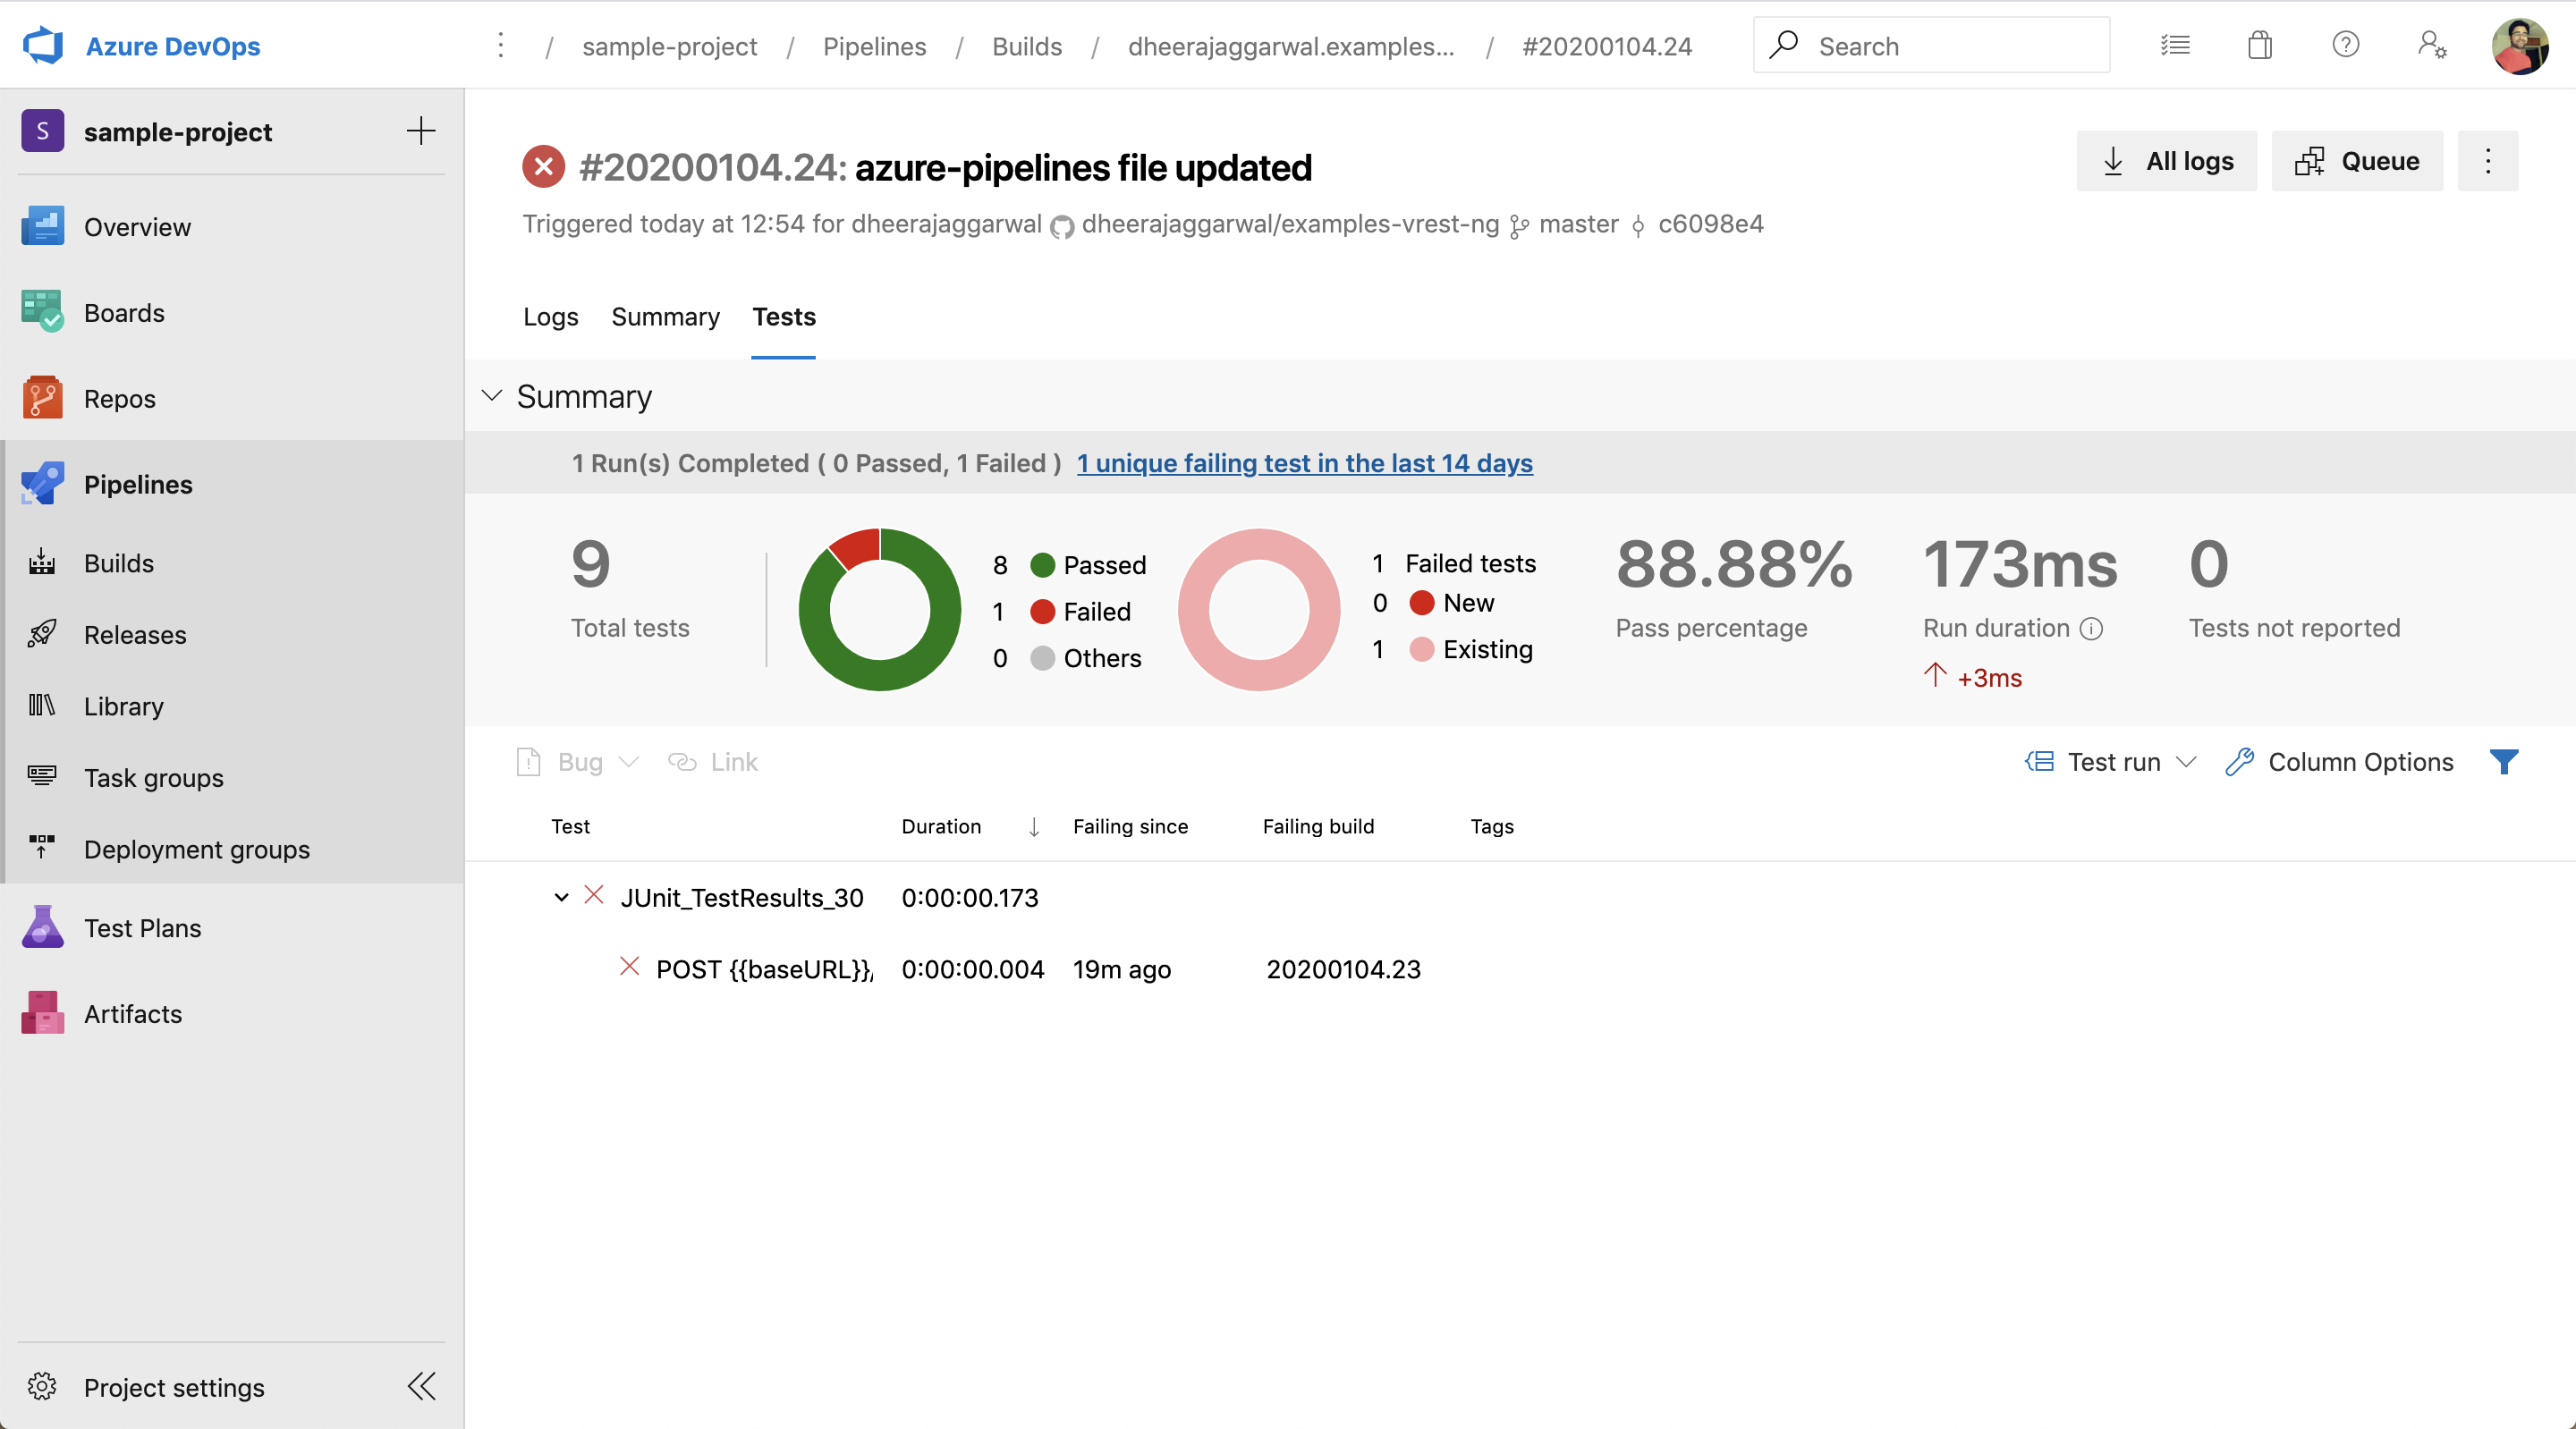
- Test Run Results
- Single Test Case Failure Report